
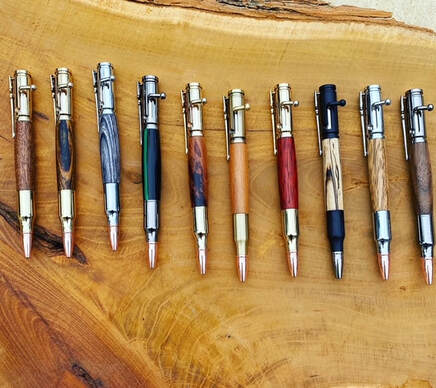
With Christmas just around the corner, JB's pens seem to be a hit lately. I always get questions on what goes into making a pen. Therefore, I thought I'd give you a peak behind the curtain on my pen making process. So sit back, relax, and settle in.
Step 1: Select and prepare the blank.
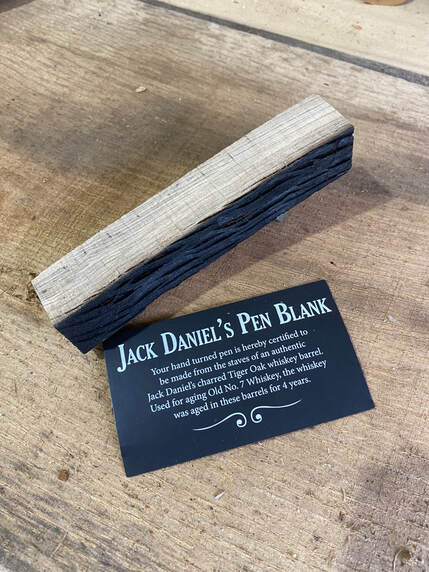
First, I find the perfect blank for the customer. Some of the wood I have was gifted to me, some was salvaged from my property, and most I buy through various online vendors. For example, the above blank is a certified piece of oak from a Jack Daniels barrel. And it smells just like it. :)
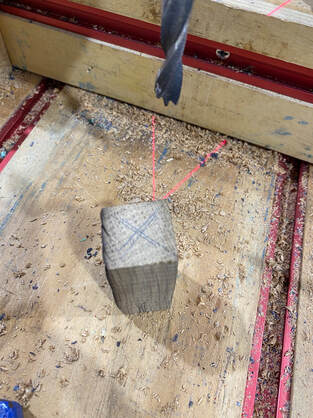
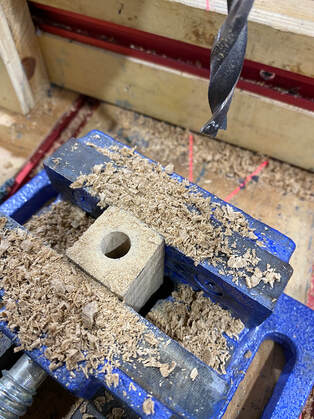
The blank is then cut to size on the bandsaw, marked for center, and then I drill the proper size hole to accept the brass tube.
First, I find the perfect blank for the customer. Some of the wood I have was gifted to me, some was salvaged from my property, and most I buy through various online vendors. For example, the above blank is a certified piece of oak from a Jack Daniels barrel. And it smells just like it. :)
The blank is then cut to size on the bandsaw, marked for center, and then I drill the proper size hole to accept the brass tube.
 |  |
Next, the brass tubes are then glued or epoxied into the blank.
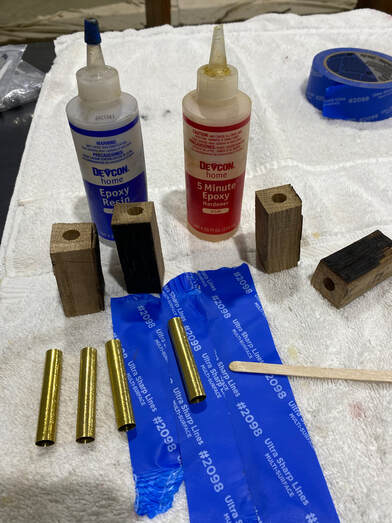 | 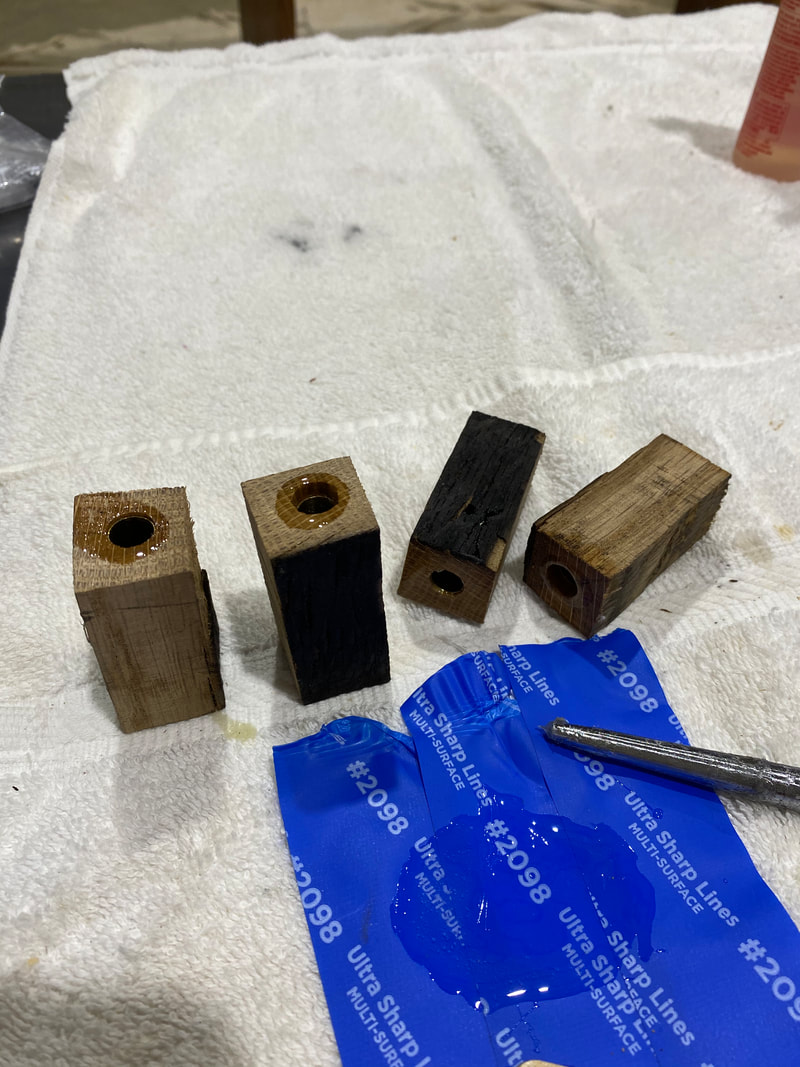 |
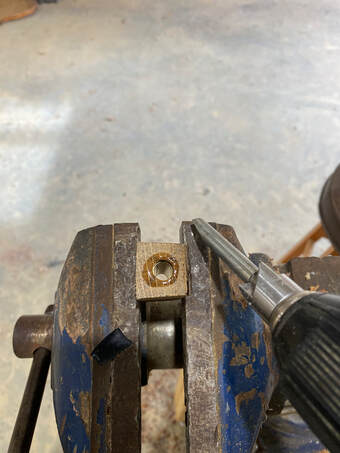
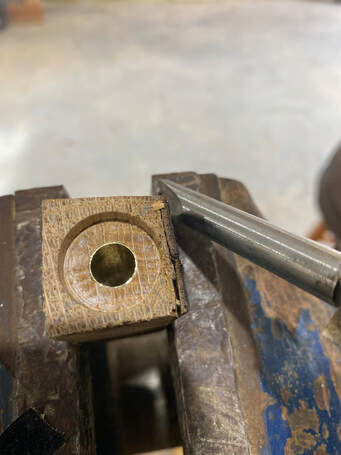
Then I trim the wood to the level of the brass tube for a perfect fit. Depending on the type of material, this can be done on a sander or with a barrel trimmer shown below.
 |  |
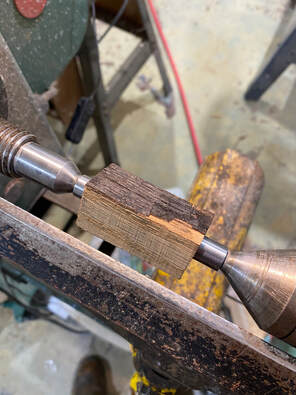
Step 2: Turn the blank to size on the lathe.
The blank is then mounted on the lathe. This can be done either between centers (i.e. between two points..for a single barrel pen) or on a pen mandrel (usually done for two-piece pens).
The blank is then mounted on the lathe. This can be done either between centers (i.e. between two points..for a single barrel pen) or on a pen mandrel (usually done for two-piece pens).
 | 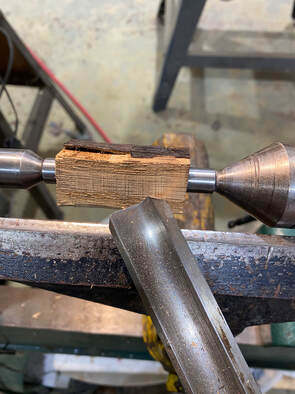 |
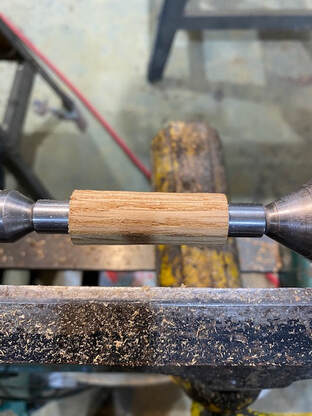
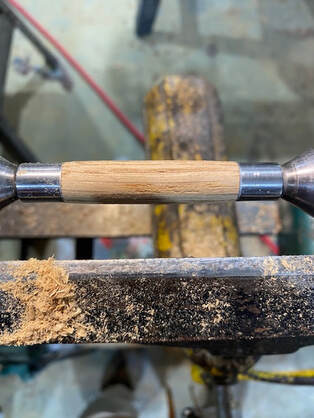
Then the blank is turned down to its final shape. The metal bushings on either end let me know how far to take the wood down so that it fits the pen perfectly.
 |  |
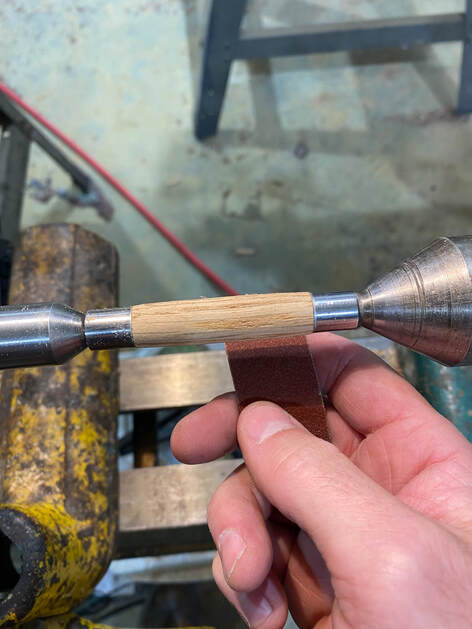
Step 3: Sanding and Finishing.
Sometimes, this is the hardest step. Some wood seems like it was made to sand into a pen. On the other hand, some are stubborn and refuse to cooperate. I usually start with 150 grit sandpaper and work my way up through 400-600 grit for wood pens and all the way up to 12,000 grit micro mesh pads for acrylic blanks.
Sometimes, this is the hardest step. Some wood seems like it was made to sand into a pen. On the other hand, some are stubborn and refuse to cooperate. I usually start with 150 grit sandpaper and work my way up through 400-600 grit for wood pens and all the way up to 12,000 grit micro mesh pads for acrylic blanks.
Depending on the material, I have used a variety of finishes on all my products. Lately, I will start with boiled linseed oil and then follow that up with cyanoacrylate glue (CA glue = "super glue") to get a good base layer established.
 | 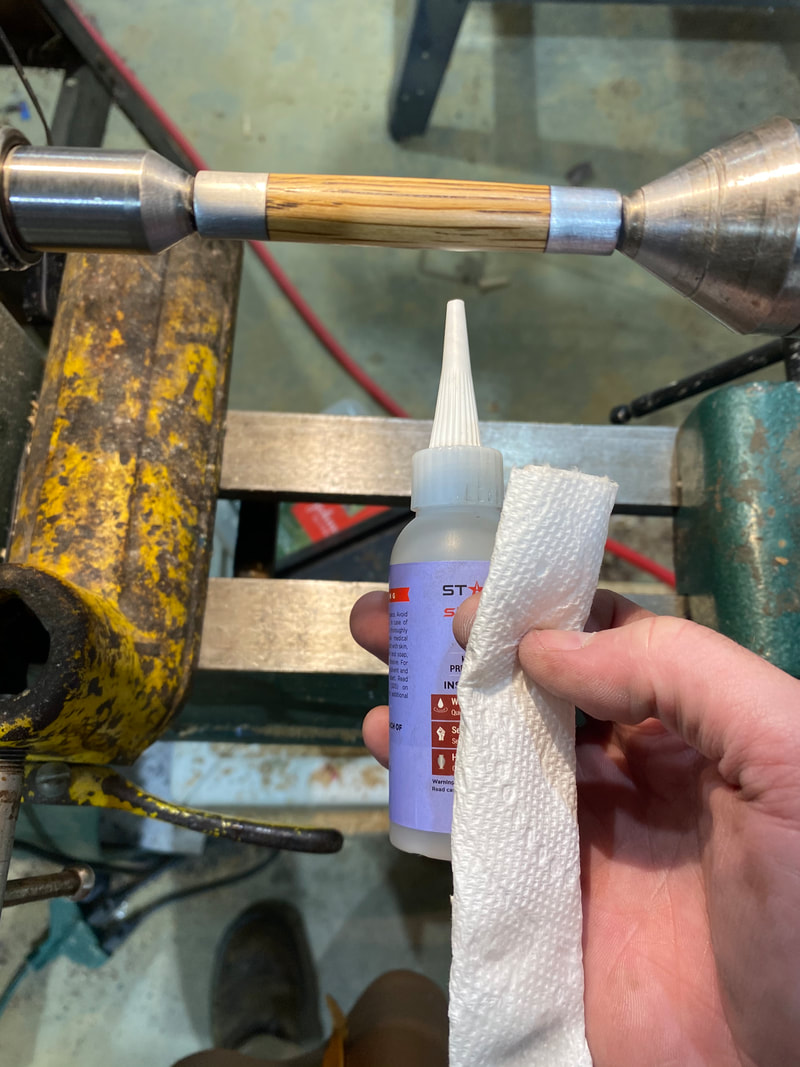 |
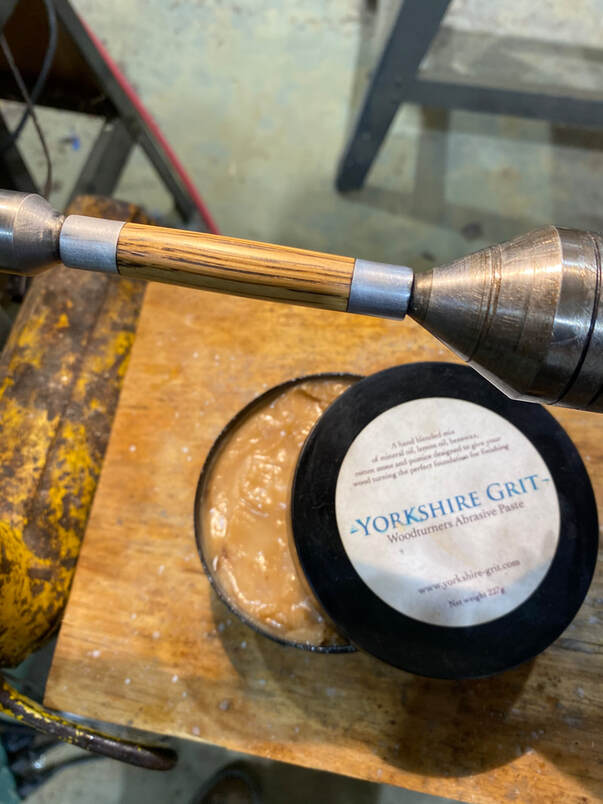
I've also been using these two products...Yorkshire Grit (a mixture of mineral oil, beeswax, and grinding powders) and Hampshire Sheen (a mix of danish oil and carnuba wax). Both are made by our friends across the pond.
 |  |
Step 4: Assemble the Pen.
When I can, I will make several pens of the same style. This cuts down on set up time at the drill press, lathe, and assembly line. When I do, and unless a customer asked for a specific combo, I usually play around with the finished pens and the available kit finishes to find the perfect match.
When I can, I will make several pens of the same style. This cuts down on set up time at the drill press, lathe, and assembly line. When I do, and unless a customer asked for a specific combo, I usually play around with the finished pens and the available kit finishes to find the perfect match.
The pens are then ready for assembly on a special pen press. The parts are very carefully pressed inside the brass tube of the pen blank.
 | 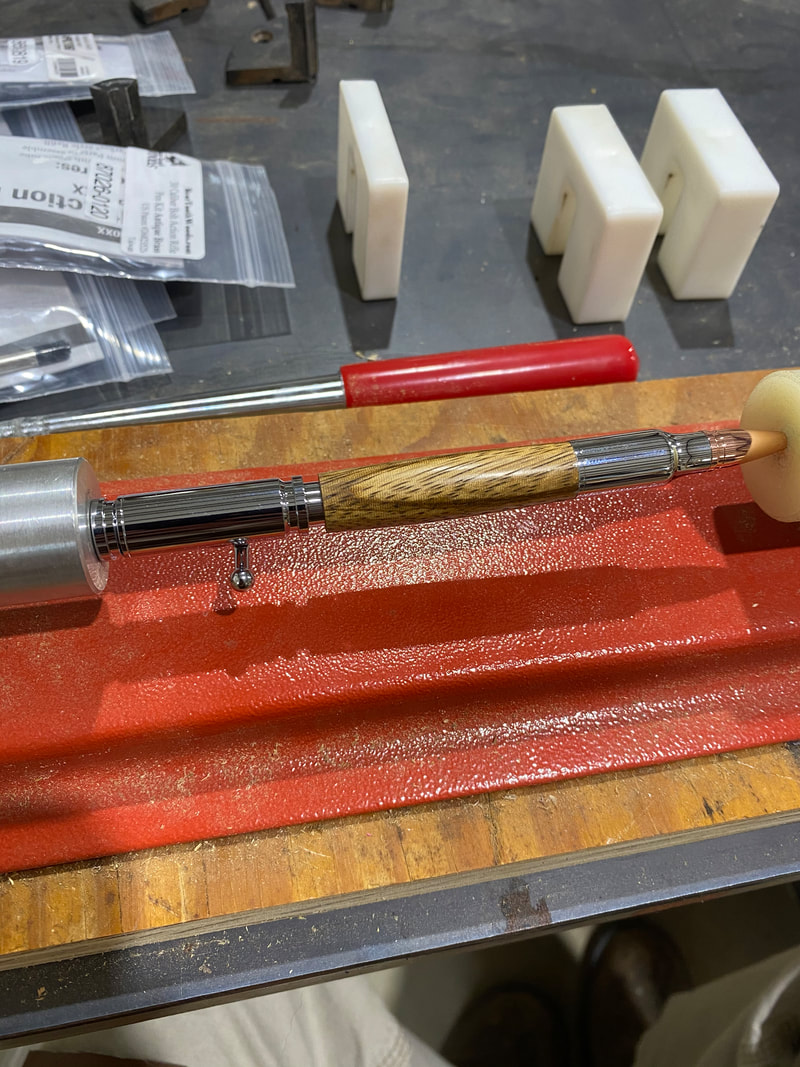 |
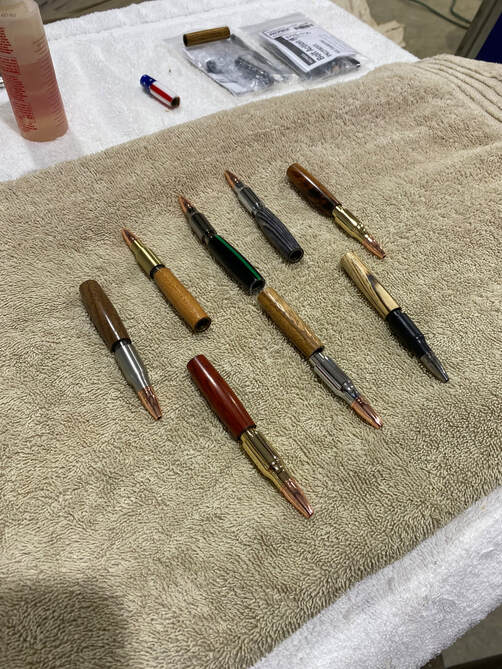
Lastly, the various parts of the pen are put together for the finished product.
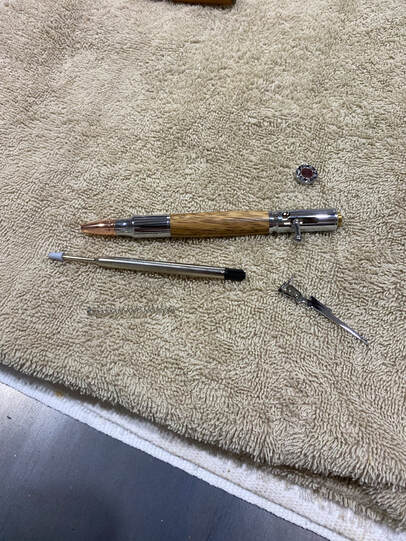
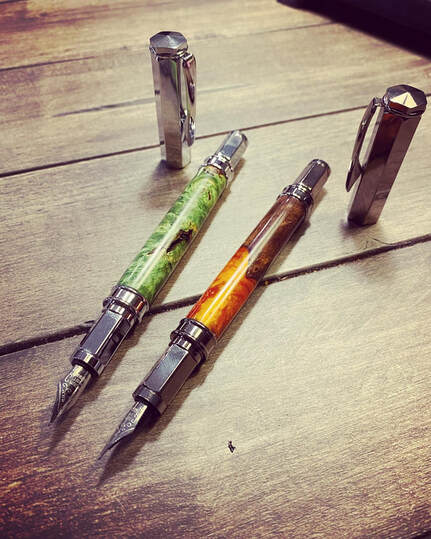
And voila! We have a JB custom made pen ready to be packaged and shipped to the customer.
Thanks for reading along. If you have any other specific questions, let me know below.
Take care and God Bless,
-jb
Thanks for reading along. If you have any other specific questions, let me know below.
Take care and God Bless,
-jb
Tools I used for this project:
--Grizzly Lathe
--Grizzly Bandsaw
--Center Finder
--WEN drill press
--Pen Mandrel
--Pen Press
--Easy Wood Turning tools
--Micro Mesh Pads
--Sandpaper
--Grizzly Lathe
--Grizzly Bandsaw
--Center Finder
--WEN drill press
--Pen Mandrel
--Pen Press
--Easy Wood Turning tools
--Micro Mesh Pads
--Sandpaper

 RSS Feed
